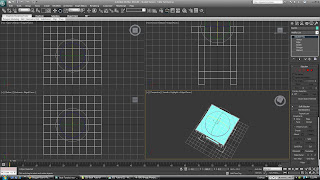
I was asked by very kind folks to give a little tutorial for modeling in 3DSMax 2011. Hopefully, this little lesson will help you get over the daunting task of getting started with 3DSMax or establishing some kind of workflow.
1) Create a Box using the Geometry Tab to the right of your windows.
2) As Pictured: In the Modify Tab under Parameters,
Have the Measurements and Segments be as the following:
Length: 80.0
Width:80.0
Height:10.0
Length Segs: 8
Width Segs: 8
Height Segs: 1
(Note: Make Sure you are in Wireframe Mode by pressings F4.That way you can see the segments)
3) Select the Object Right Click to gain a drop down menu.
In there got to Convert To > Convert to Editable Poly
5) Go back to the Modify Tab...
and you'll notice it's changed.
Click the Editable Poly drop down menu to reveal the list that contains aspects of the object you can edit:
i)Vertex: Individual points in the object can be manipulated to make smaller more detailed changes. The default settings has vertices shown as small blue dots in the corners of polygons
ii) Edges: The white lines in the object (shown with the Wireframe.) They mark where the squares (and in turn, the polygons) are. It is advised that to manipulate the entire line going through the object if you wish to modify them.
iii) Border: When there are gaps between polygons in objects, you can select all connected edges of the border. Note that Borders can only be selected when there are missing polygons that are able to be closed.
iv) Polygon: Allows you to select the polygons of the object. Individual squares can me selected to be modified extruded and such to change up the object.
v) Element: Select the entire object. When you have models with mutiple object in it this is really helpful.
With that being said...
6) In the Modify tab, choose Polygon and select the polygons as following:
Under Edit Poly
Click the small window button next to the Extrude button
Not the button itself, but the window button next to it.
A small window will pop up near your polygons where you can have more control over the extrude
Extrude the polygons to about 20 units.
(Note: don't forget to hit the check mark to confirm your change)
7) Repeat step 5 to extrude the table legs
Now for the tougher more advanced techniques...
8) Select Edge from the Modify menu to select the edges of each leg as pictured
Under Edit Edges (The same spot where Edit Poly would be) click the small window next to the Connect button just as you did with the Extrude button.
Change the number of segments to 2
(On a totally optional note, you can also change the Pinch to -40. It will save you a lot of headache later)
At the top of your window use the Select and Move tool, select the all lines surrounding the all the legs
Move the lines along the Vertical Z axis (the blue arrow) to adjust where the segments will be.
9) Select the Polygon Modifier again and use it to select the inside polygon of the legs
and delete them
Now to pile it on...
10) With the Edge Modifier selected, select the edges
of the leg gaps as so:
And under the Edit Edges (same place as Edit Polygons), Click the window next to the Bridge button, to "bridge" the space between the edges.
(Note: You can only bridge gaps where edges can connect. Any attempt to do otherwise will be met with disastrous results.)
Repeat this for all the legs until they are all connected
11) Use the Border Modifier to select the border of the missing top
and click the cap button under Edit Border (you remember where it is)
Repeat this step for the bottom piece
Yes! You've modeled a simple end table! But When's the last time you've seen a table that was upside down? You'll need to fix that.
Use the Select and Rotate tool from the top of the window
And flip the object using the Circular axis, specifically the X-Axis (green) or the Y-Axis (Red) to bring the table upright
And there you have it! You know the barebones basics of modeling in 3DSMax 2011! One of these days, I'll also to a post about how to texture or animate but not now.
If you have any questions feel feel to commet or message me and I'm sure I can help you out!


No comments:
Post a Comment